Introduction
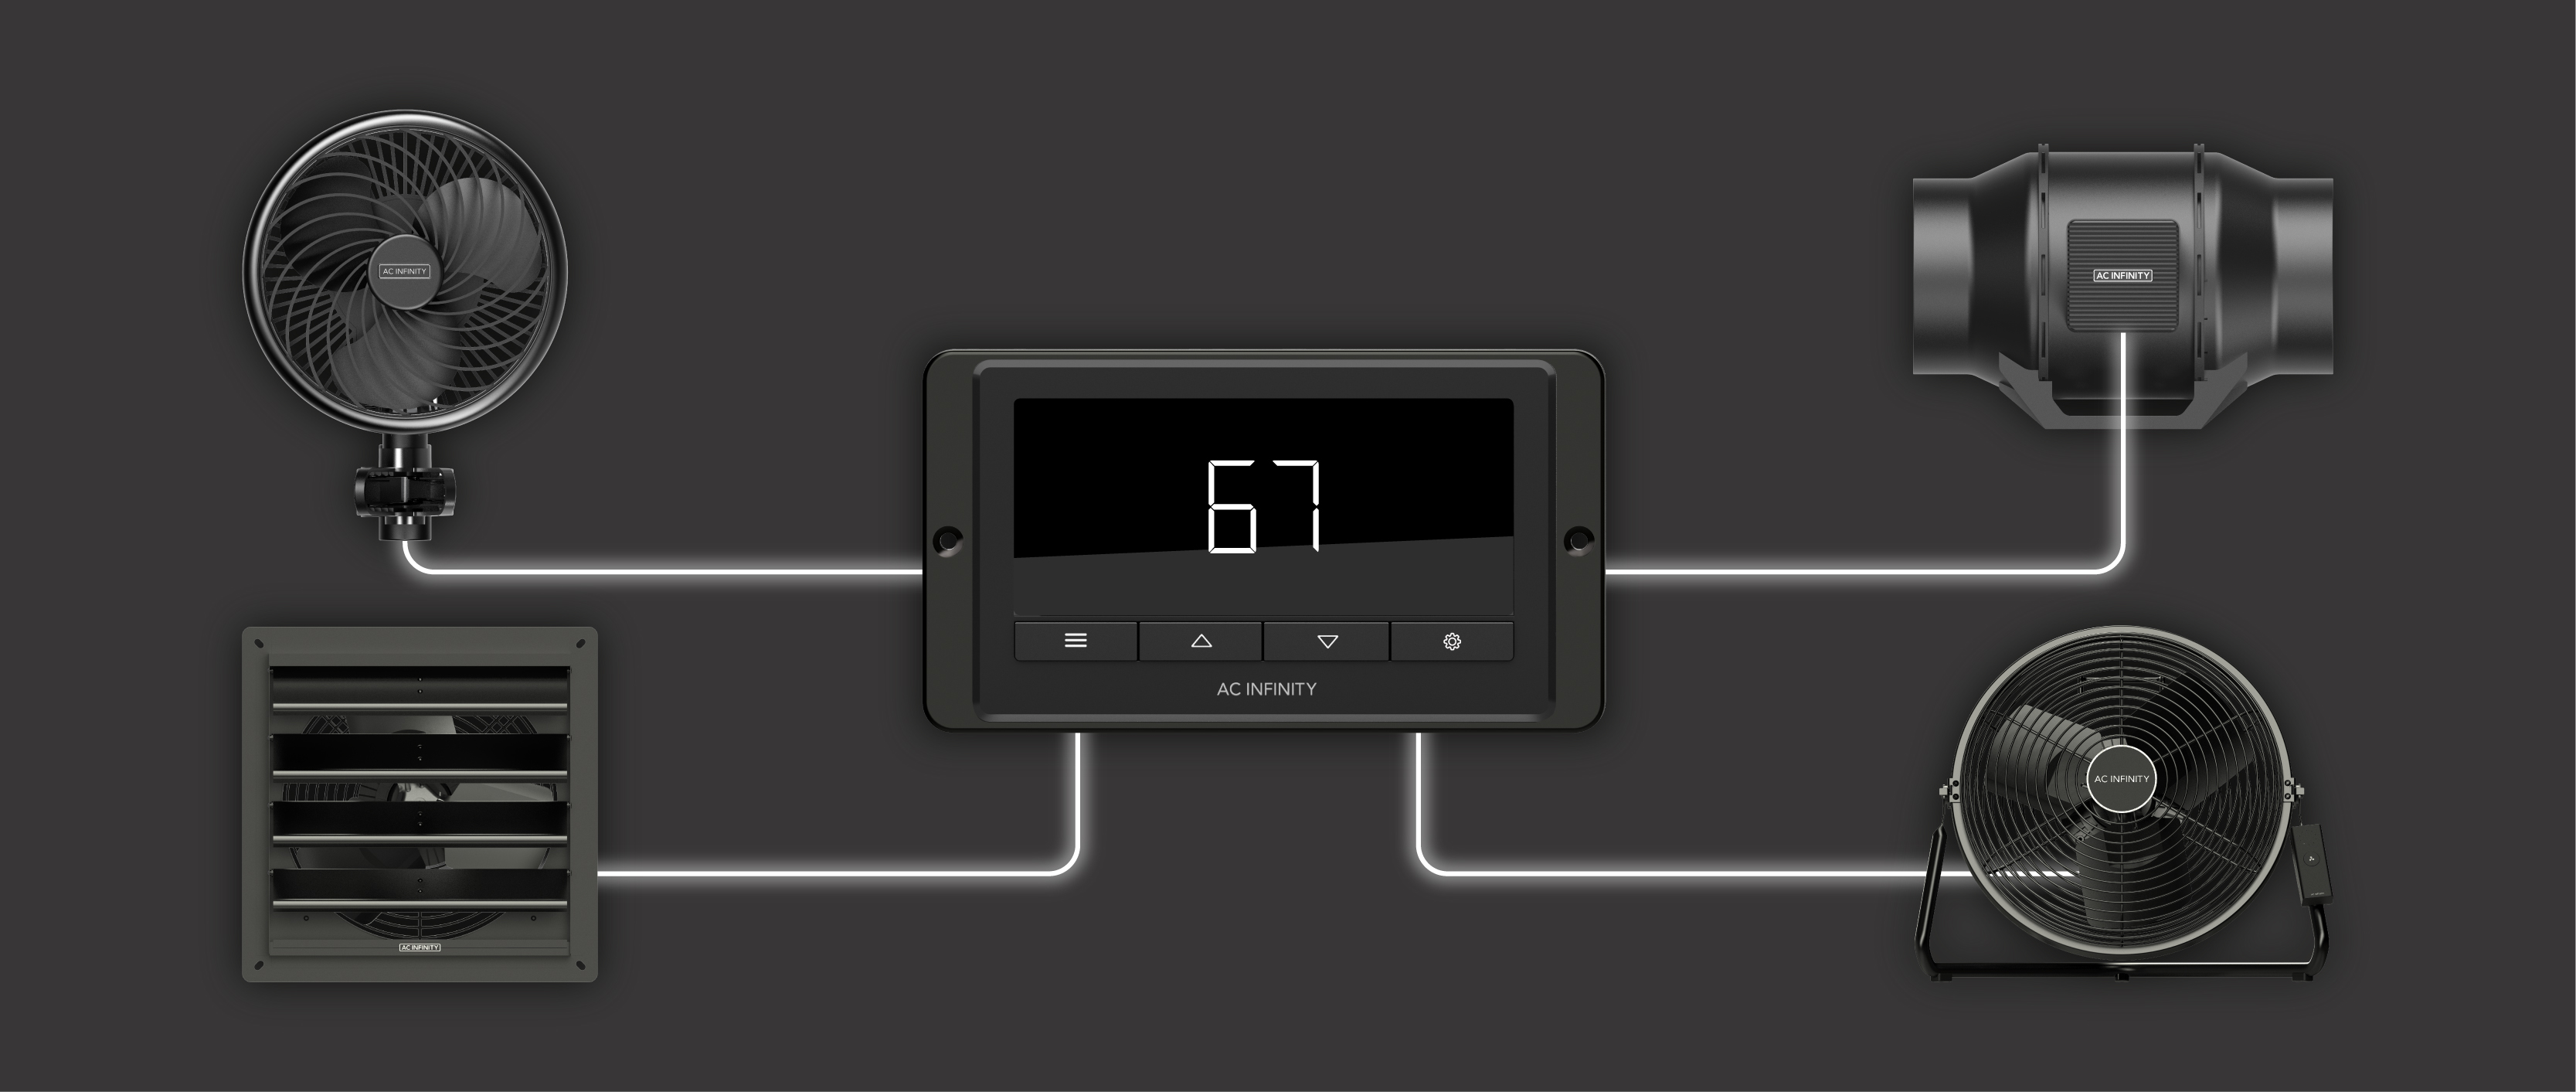
Welcome to the AC Infinity UIS™ ecosystem, the most advance and versatile environmental control platform in the world! Choose from an expanding selection of equipment that can work together to achieve your ideal environment. Mix and match any two UIS fans to connect to our smart controller to provide both with advance programming, tailored to your application. Our innovative system can finely optimize each fans output levels from 0 to 10 speed, to precisely reach your target climate.
MODELS - CONTROLLER 67 (CTR67A) EQUIPMENT CONTROLLED - UIS™ Fan Devices, see Compatibility List NUMBER OF EQUIPMENT - 2 Devices, Shared Programming CONNECTOR TYPE - Molex, but can be converted to UIS using a UIS-TO-MOLEX ADAPTER CONTROL TYPE - PWM 10 Levels PROGRAMS - Temperature and Humidity Triggers, Timers, Cycles, Schedules, Advance Programs via App SETTINGS - Max/Min Levels, Dynamic Transitions, Lock/Hide Display, F°/C°, Calibrations, and More CLIMATE SENSORS - Temperature and Humidity APP CONNECTION - Bluetooth

Quick Start

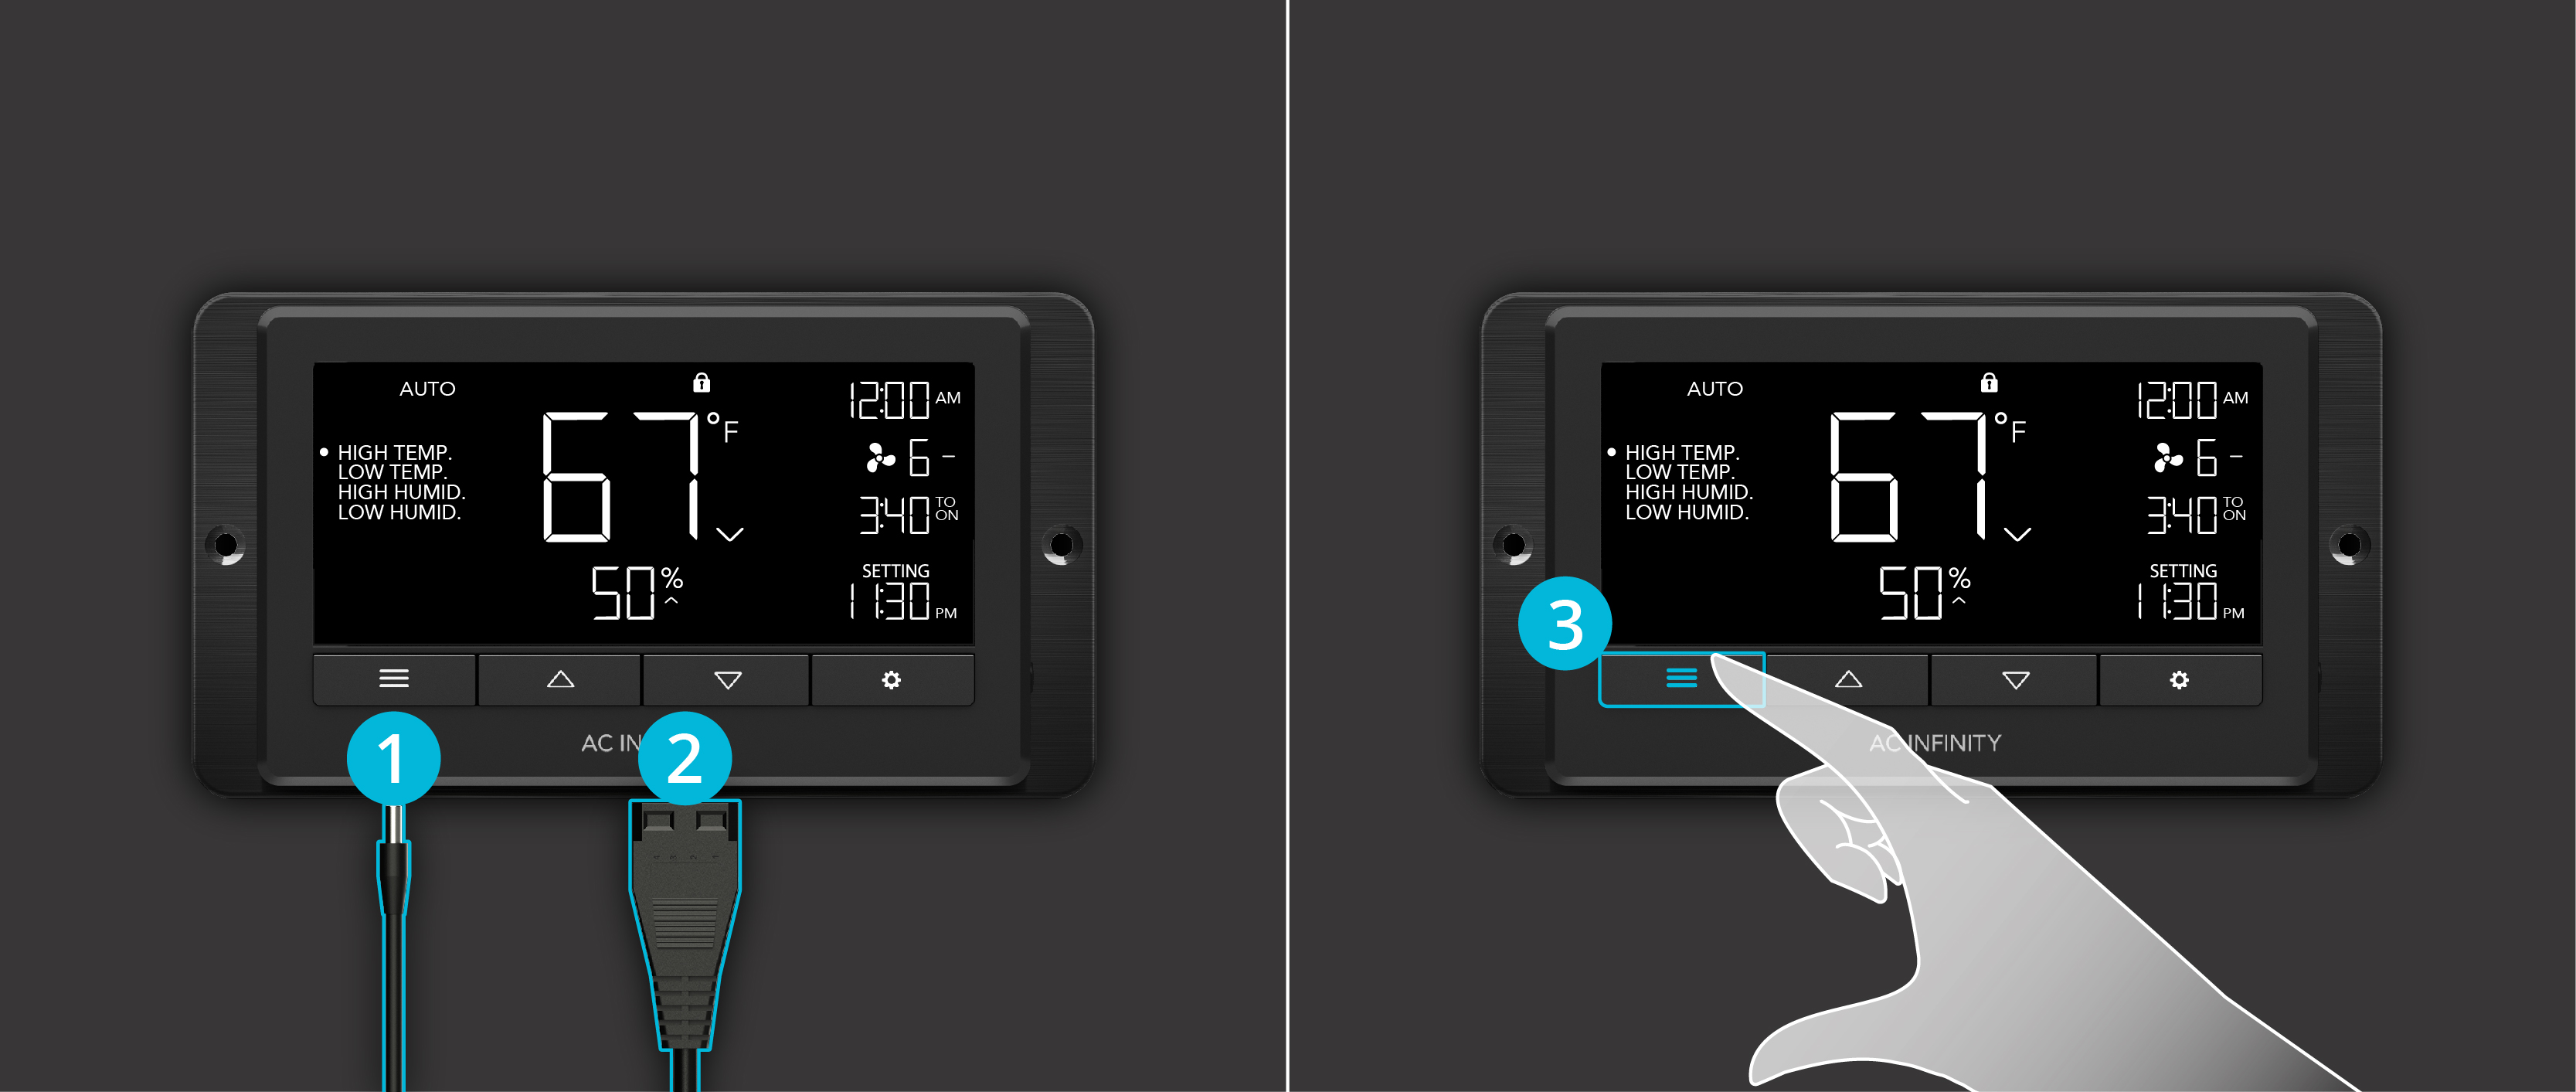
1. Plug the temperature/humidity sensor into the designated port behind the controller. 2. Plug your first UIS device into one of the four-pin ports behind the controller, which will also power the controller. 3. Press the "Mode Button" until you reach the desired program for your device to run. See below for Mode info. 4. Press the "Up/Down Button" to adjust your Mode's parameters, program will automatically start running. 5. Check for settings that may affect your programming, see below. Return to desired Mode to resume program. 6. Plug in another UIS fan if needed to share the same program.
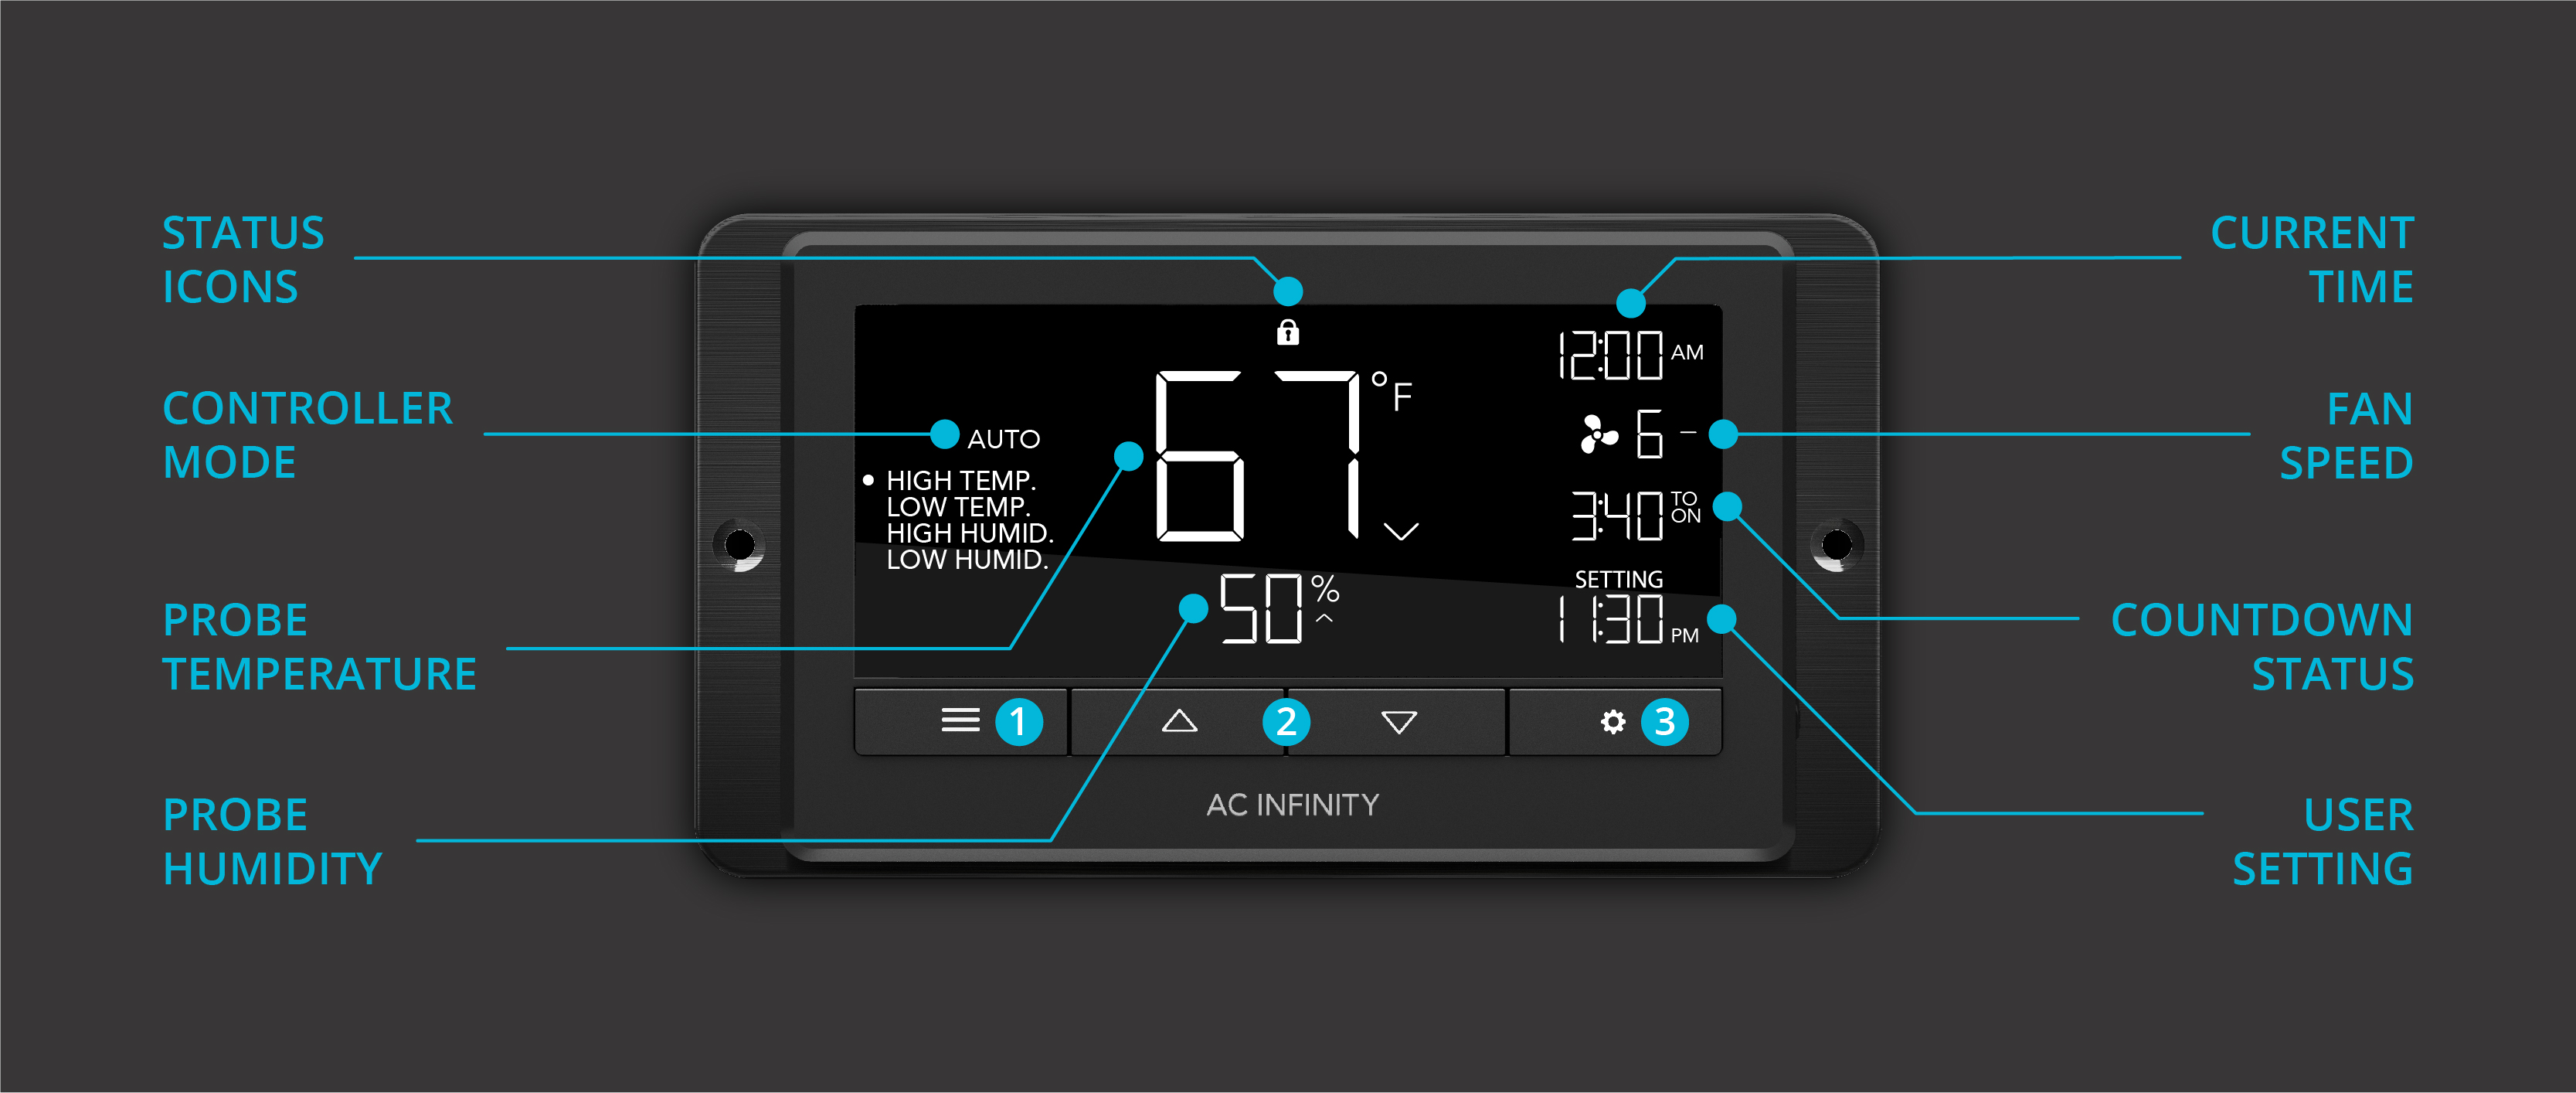
Controller Diagram

1. Mode Button – Cycles through all of the controller’s modes. 2. Up/Down Buttons – Adjusts the parameters of the mode or settings you are viewing. 3. Setting Button – Cycles through all of the controller’s settings.
Programming Modes

• OFF Mode – Set the device to turn off. • ON Mode – Set the device to run continuously at a level from 0 to 10. • AUTO Mode – Set temperature and humidity triggers that will turn the device on or off. • TIMER TO ON Mode – Set a one-time countdown that will turn the device on once it ends. • TIMER TO OFF Mode – Set a one-time countdown that will turn the device off once it ends. • CYCLE Mode – Set an on and off duration that your device will repeat continuously. • SCHEDULE Mode – Set an on and off clock time that your device will repeat daily.
Settings that Affect Programming
• Max and Min Level Setting – Set the maximum and minimum level a device can run at, which affects all modes. • Transition Setting – Set the device to ramp up in levels gradually as the temperature and humidity gets further away from your set target. Only affects AUTO Mode. • Other Settings – Other controller settings including switching between F° and C°, display brightness, sensor calibrations, and more.
Alert Icons
![]()
1. Advance Programming – Displays when an advance program set in the app is active. 2. High Temperature Alarm – Flashes and beeps with an alert if the temperature rises above the app trigger point. 3. Low Temperature Alarm – Flashes and beeps with an alert if the temperature falls below the app trigger point. 4. High Humidity Alarm – Flashes and beeps with an alert if the humidity rises above the app trigger point. 5. Low Humidity Alarm – Flashes and beeps if the humidity falls below the app trigger point. 6. Timer Alert – Flashes when a countdown has completed in the TIMER, CYCLE, or SCHEDULE Mode. 7. Bluetooth – Appears when the physical controller is connected to the app via Bluetooth. 8. Check Fan Alert – Flashes when the fan's probe senses interference to its functioning. 9. Display Lock Alert – Displays when you lock the controller.
App Control, Alerts, and Advance Programs
Connect your controller to the AC Infinity App to unlock advance programming, data graphs, alerts, and more. Follow the step-by-step instructions on Connecting to the App page, and then view the App Overview page to learn more about using the App.


