Controls Tab
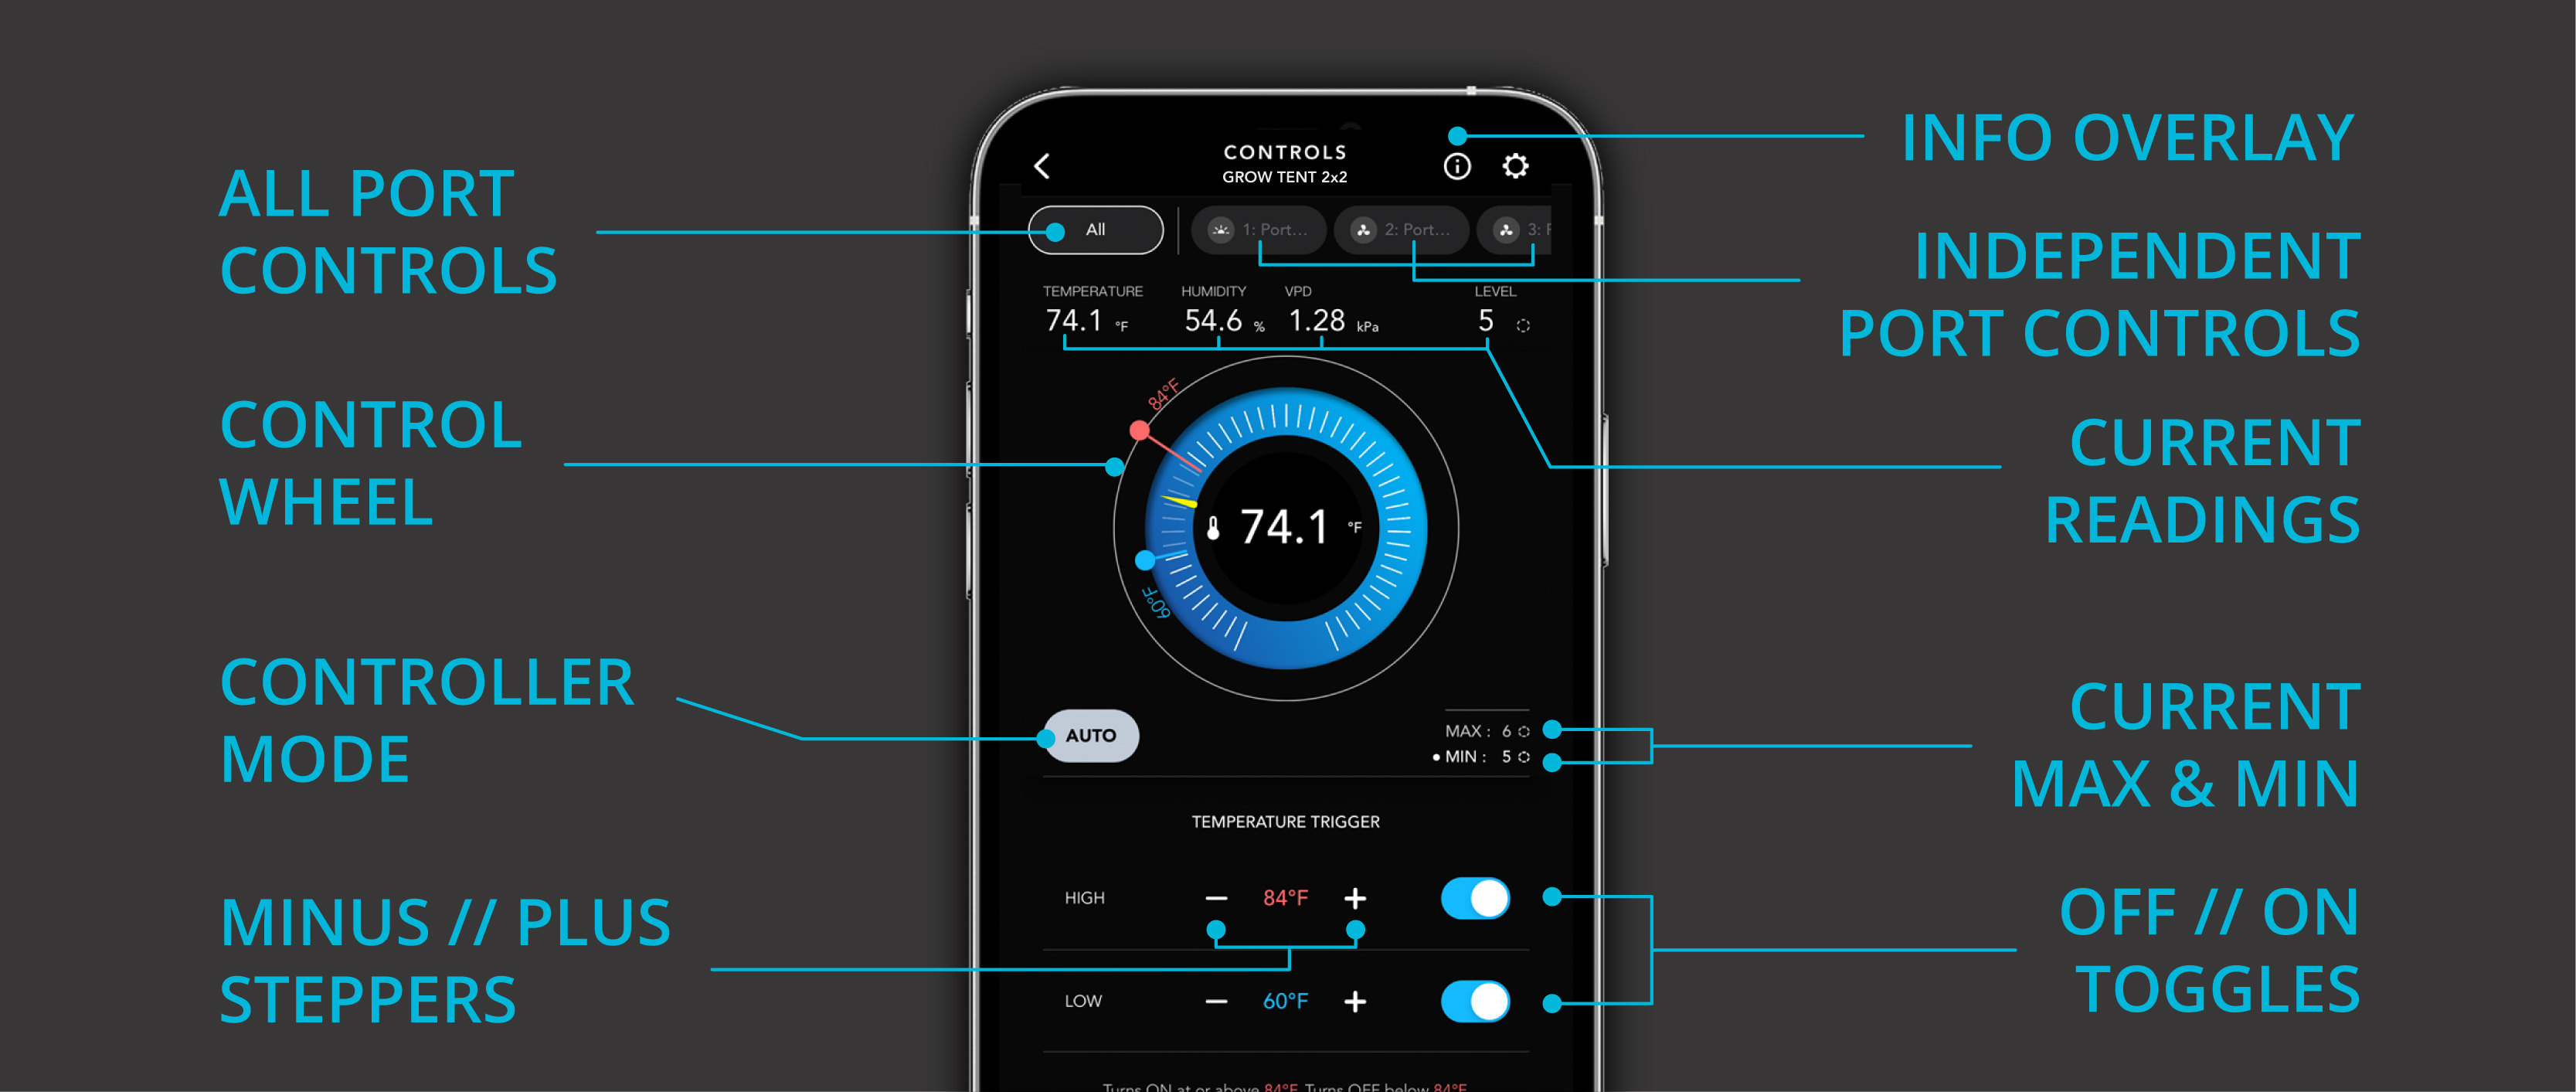
The wheel provides a visual representation of the controller’s functions, featuring hands that you can slide to easily adjust fan speed and triggers. You can also change settings by using the slider below the wheel or by tapping the “+/-” buttons for more precise adjustments. In the wheel’s center displays the current fan speed, time, and climate condition of the space in which the probe is set. The orange hand along the wheel indicates the current temperature or humidity along with the number in the center.

Programming Modes

You can toggle between climate readings and triggers by selecting the following:
OFF Mode – Set the device to turn off. ON Mode – Set the device to run continuously at a level from 0 to 10. AUTO Mode – Set temperature and humidity triggers that will turn the device on or off. TIMER TO ON Mode – Set a one-time countdown that will turn the device on once it ends. TIMER TO OFF Mode – Set a one-time countdown that will turn the device off once it ends. CYCLE Mode – Set an on and off duration that your device will repeat continuously. SCHEDULE Mode – Set an on and off clock time that your device will repeat daily.
Settings That Affect Your Programming

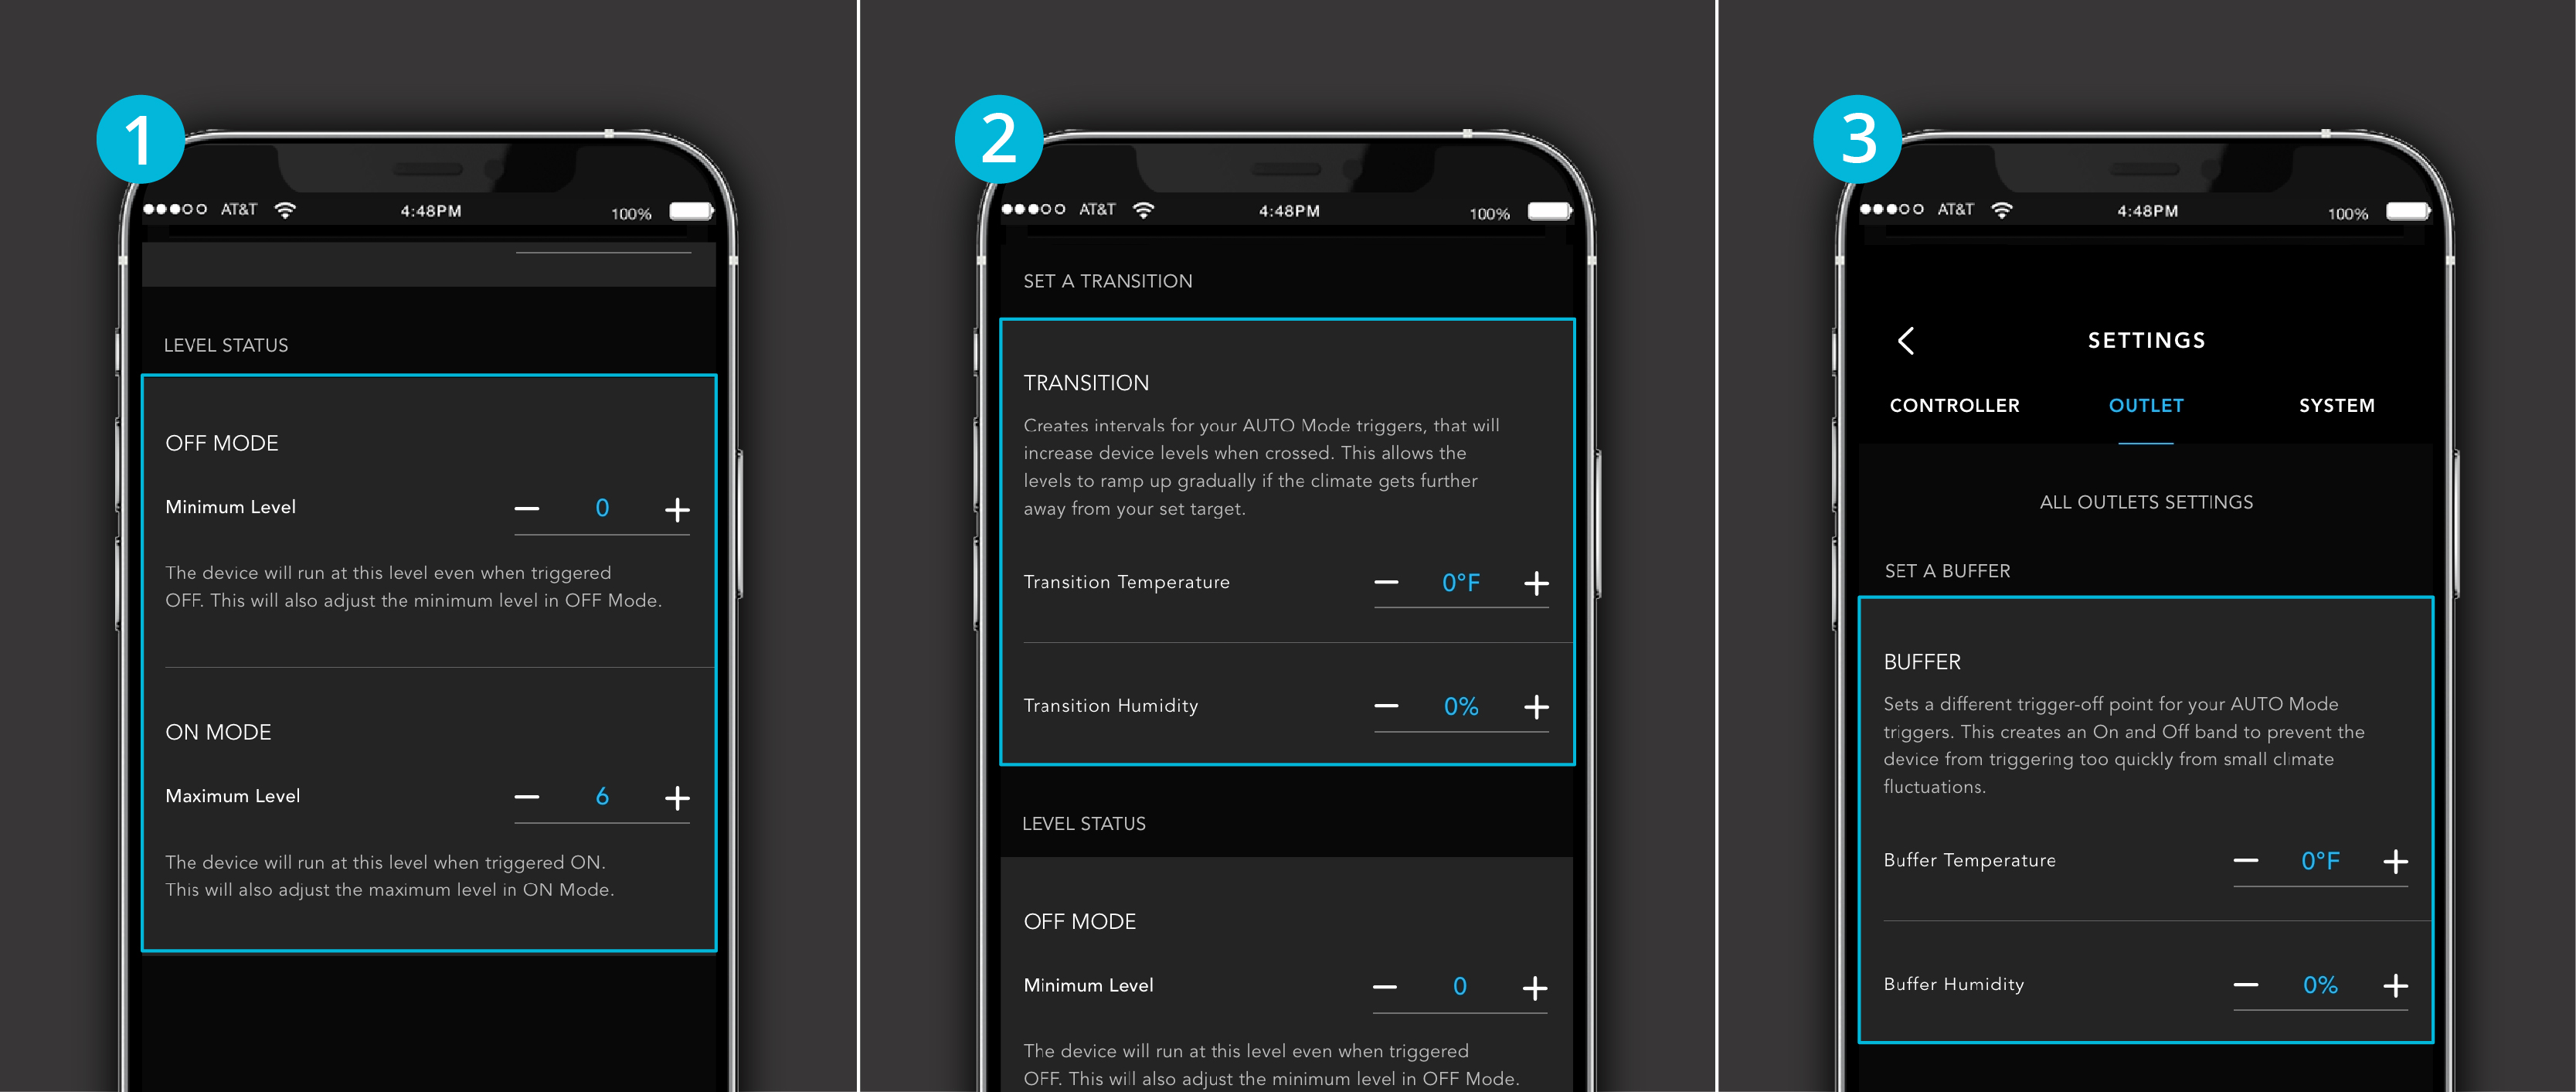
1. Maximum and Minimum Level Settings – all programming modes can be limited by these settings. When the device is triggered to be off, it will run at the minimum level you had set. When the device is triggered to be on, it will run at up to the maximum level you had set. The max and min setting is the level you had set in ON and OFF mode, respectively.
2. Transition Settings – programs the device to dynamically adjust its levels based on the gap between the temperature and humidity and your target.
3. Buffer Settings – applies to outlet devices, which can only be turned on or off, and adds a band to your temperature and humidity triggers to prevent your device from turning off too quickly.


