
How to Adjust your CLOUDLINE Logo Cap

Growers like you have a handful of things to manage when creating a custom grow tent build. Not only do you have to decide what to grow and how much, but you must also figure out how to fit them together. The last thing you need to worry about is an upside down or sideways logo when all your components are assembled. Fortunately, there is a quick and simple way to change your CLOUDLINE fan’s motor cap to your desired orientation, all without affecting your warranty.
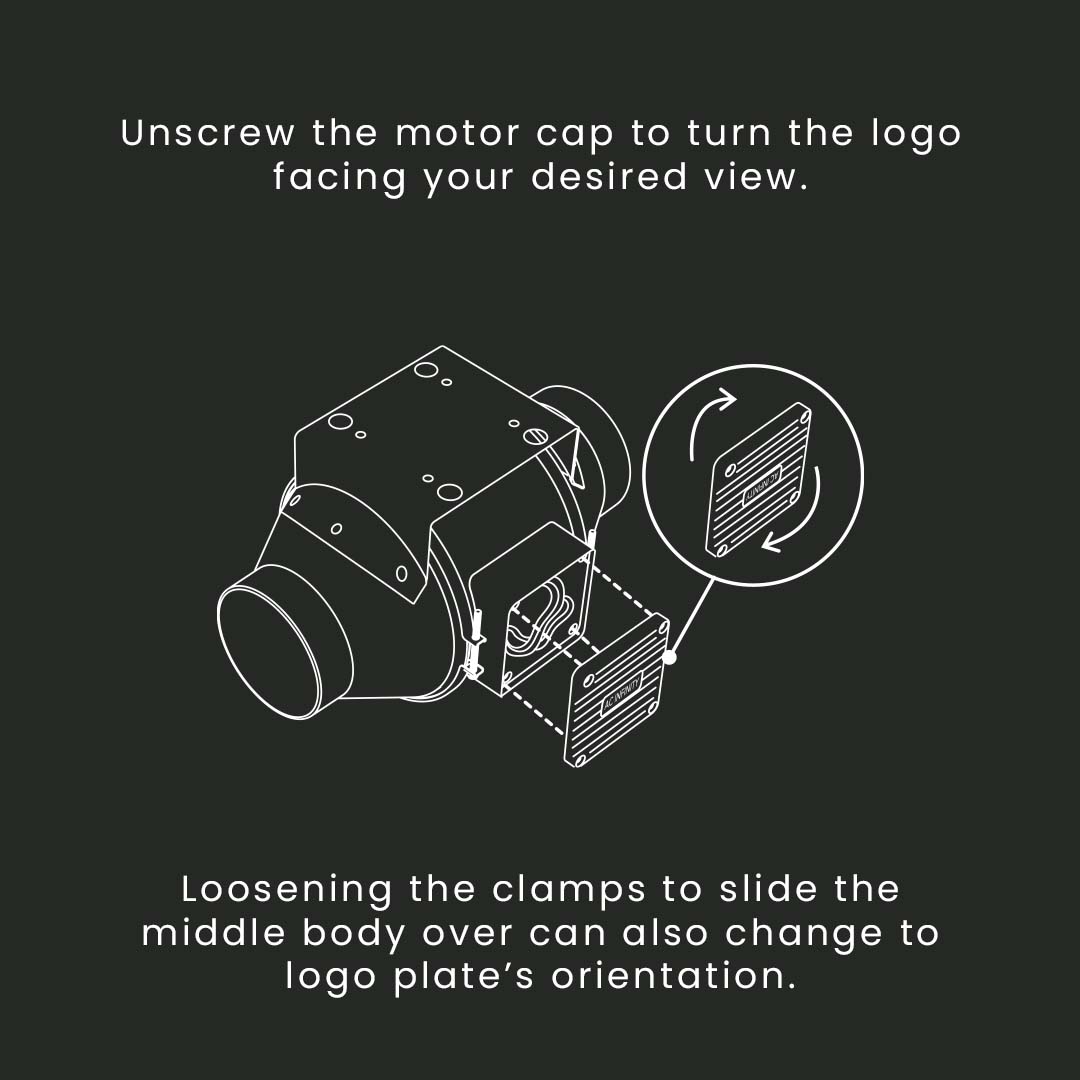
There are two methods you can use to change your motor cap’s positioning. However you set your inline fan, its motor cap may not appear as you want it to. But this can easily be adjusted with just a Phillips screwdriver.
The first method can be done with any CLOUDLINE model and does not require you to take it down after you install it. Simply unscrew the bolts holding the motor cap in place and remove it, which will reveal the cable-managed wires beneath it. Rotate the motor cap to your desired position, place it back over the wires, and reapply the bolts to complete the adjustment. Its square shape enables it to seamlessly fit no matter what its orientation is.
This second method applies to CLOUDLINE S and T-Series models only and may require you to perform it before you fully assemble your ductwork. First loosen the flange bracket from the stator blade assembly by unscrewing the metal rings. Rotate the flange bracket to your desired position and reapply the screws to secure it to the stator blade assembly. This method is ideal for builds where you want to keep the airflow moving in its native direction, but still want to reveal the AC Infinity badge. This may come up in hanging or wall mounting applications.
Both methods may be applied in situations when you want to orient the inline fan itself to direct the airflow while keeping the mounting plate out of sight.


