
Product Overview
MODEL – Peristaltic Pump
CONTROL TYPE – 10 Levels
Power ON/OFF and Cycling

Press the power button to turn your pump on and adjust its speed level. It will default to speed level 6 upon first-time use. Passing speed level 10 will turn it off. Hold the button for 2 seconds to turn it off from any level.
Connecting to CONTROLLER AI+
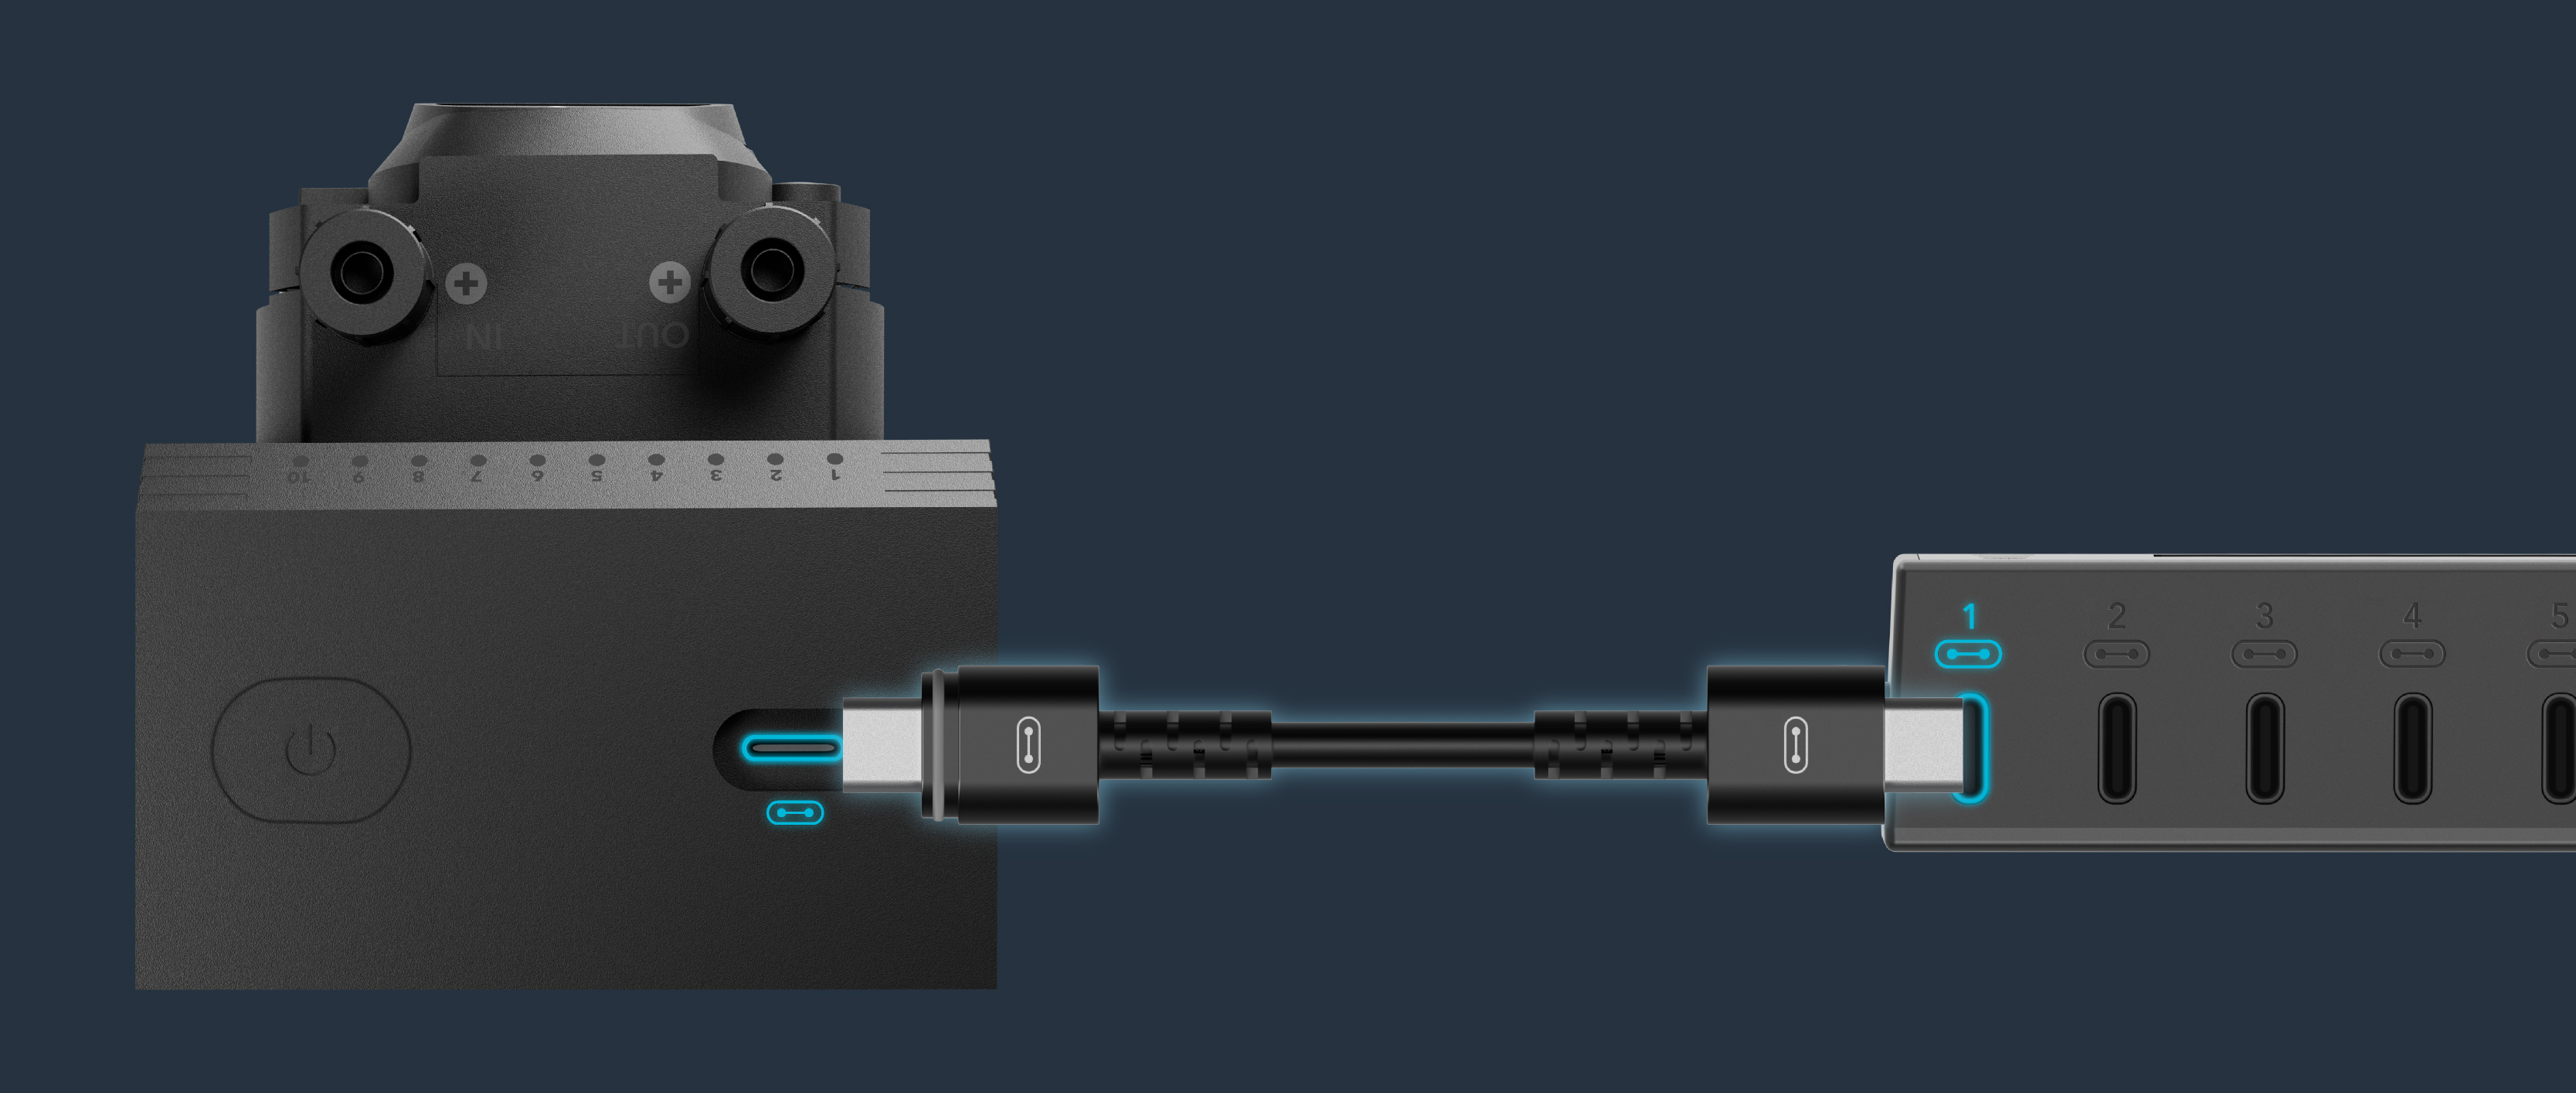
The peristaltic pump can connect to all smart UIS controllers (sold separately) as part of an integrated system using the included UIS extension cord.
You may plug the included UIS extension cord into the top-side port to connect your pump to your UIS controller.
Plug the UIS connector with the gasket end into your pump. The gasket is specially designed to protect against liquids and dust.
Your controller will override all onboard settings, assume control (parameters must be adjusted on your controller), and shut off your pump’s display and touch functions when connected in this manner.
CONTROLLER AI+ Quick Start

- Plug the power adapter into the base of the controller. Plug its other end into a power outlet.
- Plug the temperature/humidity/VPD sensor into the designated port on the bottom of the controller.
- Plug your peristaltic pump into one of the eight ports on the base of the controller.
- Press the "Port Button" until you reach the port that your device was plugged in. See below for diagram.
- Press the "Mode Button" until you reach your desired programming. See below for Mode info.
- Use the "Up/Down Button" to adjust your Mode's parameters.
- Check for settings that may affect your programming; see below. Return to your desired Mode to resume programming.
- Plug in another UIS device as needed, then repeat steps 3 to 6.
Controller Diagram

Programming Modes

• OFF Mode – Set the device to turn off. • ON Mode – Set the device to run continuously at a level from 0 to 10. • AUTO Mode – Set temperature and humidity triggers that will turn the device on or off. • VPD Mode – Set VPD (vapor pressure deficit) triggers that will turn the device on or off. • TIMER TO ON Mode – Set a one-time countdown that will turn the device on once it ends. • TIMER TO OFF Mode – Set a one-time countdown that will turn the device off once it ends. • CYCLE Mode – Set an on and off duration that your device will repeat continuously. • SCHEDULE Mode – Set an on and off clock time that your device will repeat daily.
Alert Icons
![]()
1. Advance Programming – Displays when an advance program set in the app is active. 2. Alarm – Flashes when an alert set in the app is triggered. 3. Temperature/Humidity Alert – Flashes if the temperature/humidity meets your set trigger point. 4. Timer Alert – Flashes when a countdown has completed in the TIMER, CYCLE, or SCHEDULE Mode. 5. VPD Alert – Flashes whenever either VPD mode triggers activate your device. 6. Bluetooth/WiFi – Appears when the physical controller is connected to the app via Bluetooth or WiFi. 7. Display Lock Alert – Displays when you lock the controller. 8. Device Error Alert – Flashes when a connected device detects an issue. Check your devices to troubleshoot any issues.
App Control, Alerts, and Advance Programs
Connect your controller to the AC Infinity App to unlock advance programming, data graphs, alerts, and more. Follow the step-by-step instructions on Connecting to the App page, and then view the App Overview page to learn more about using the App.
Programming with the Hydro Sensor
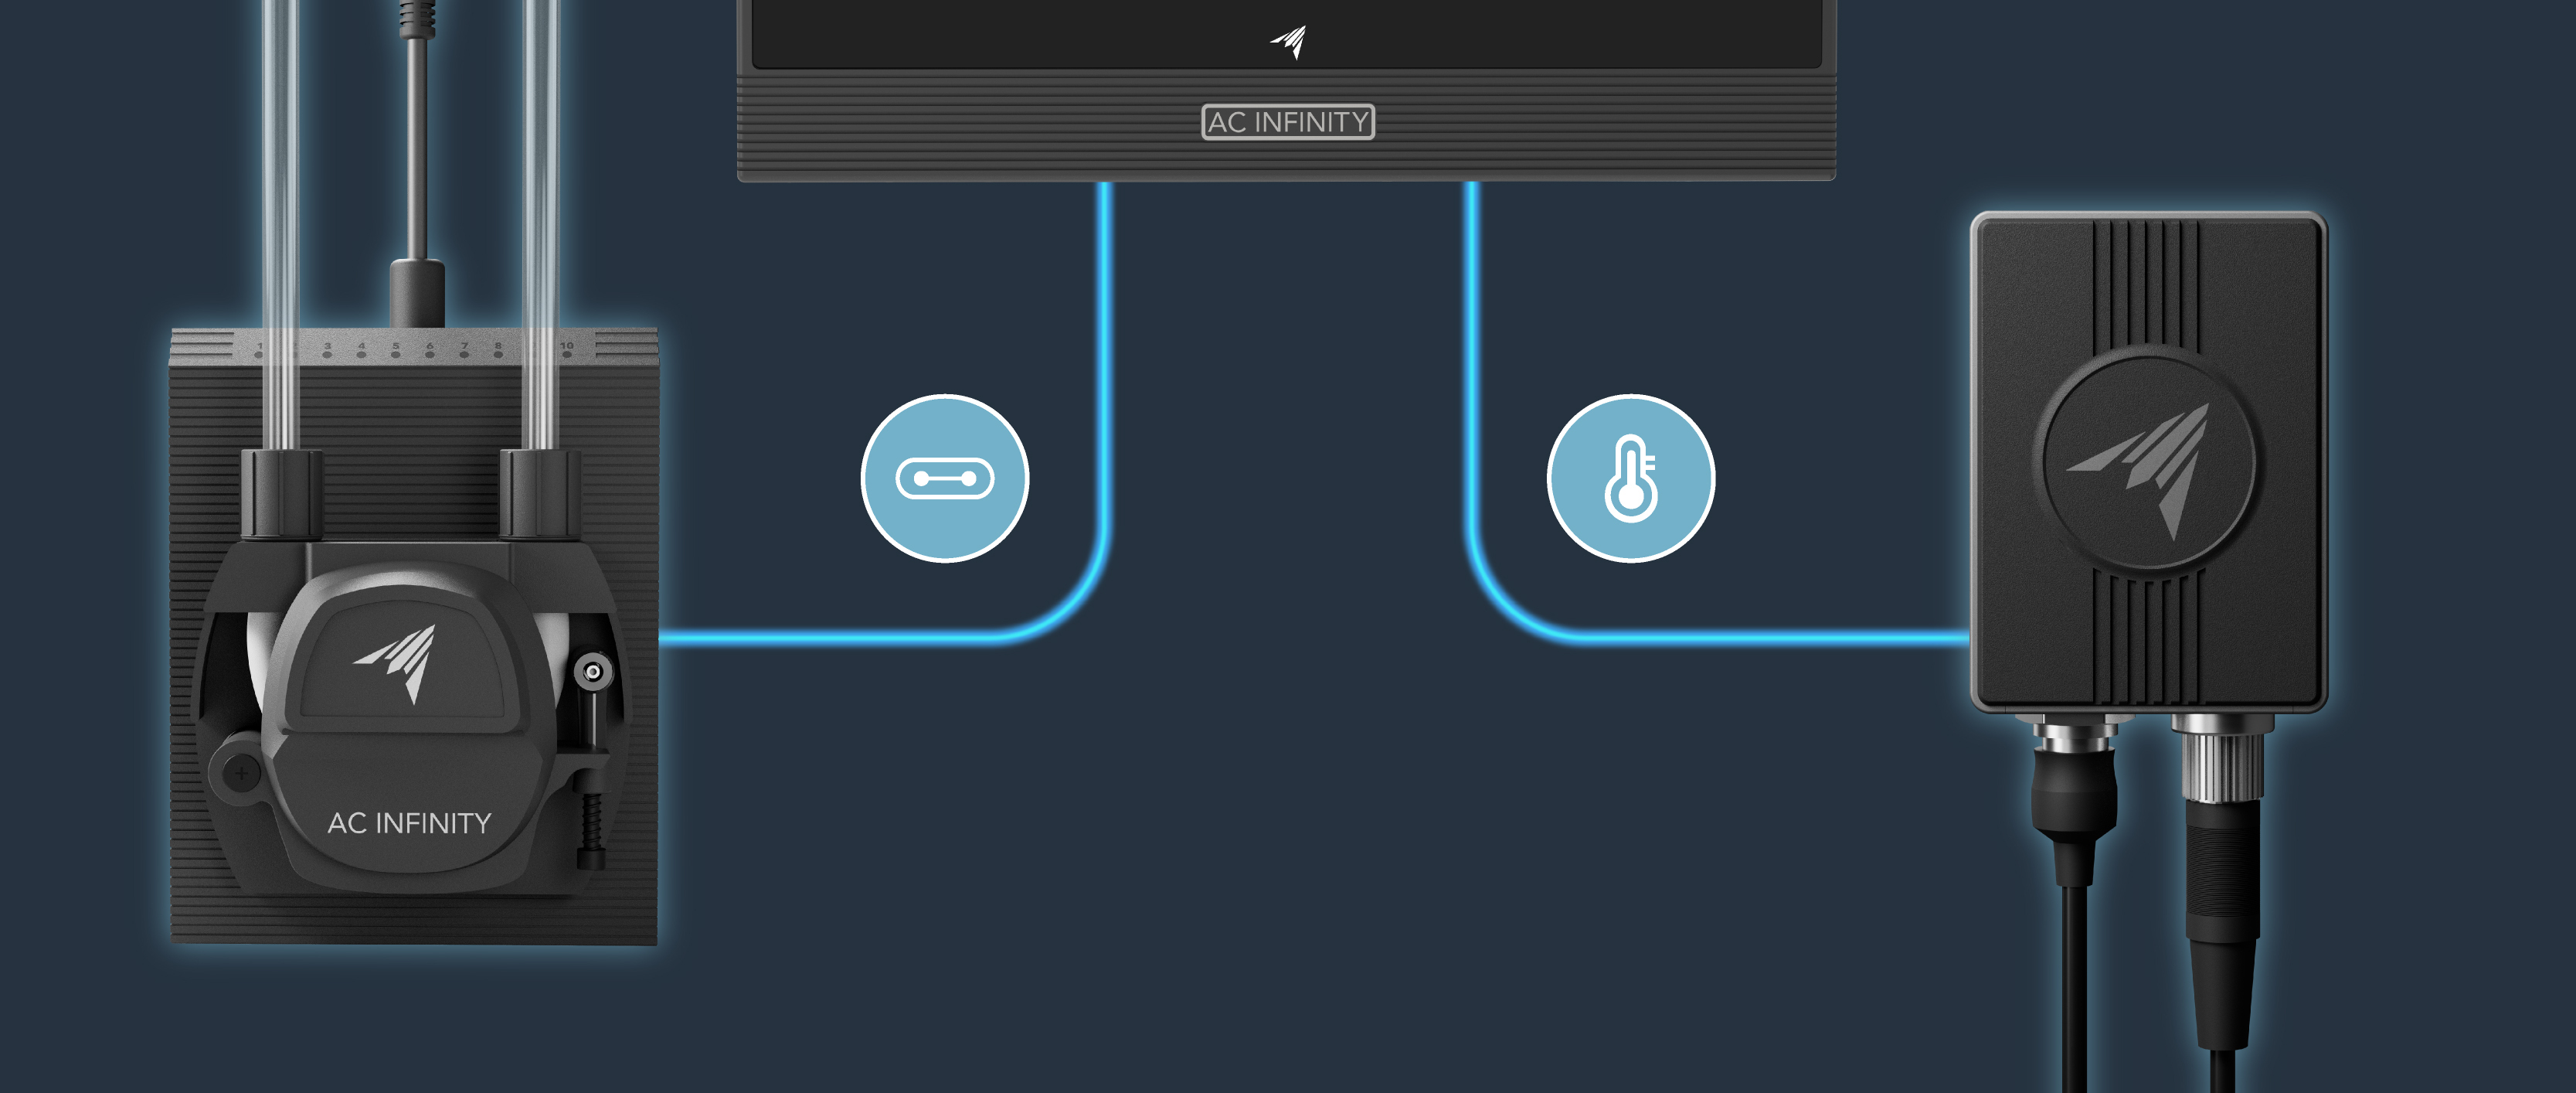
Connect the Hydro Sensor to one of the CONTROLLER AI+ sensor ports.
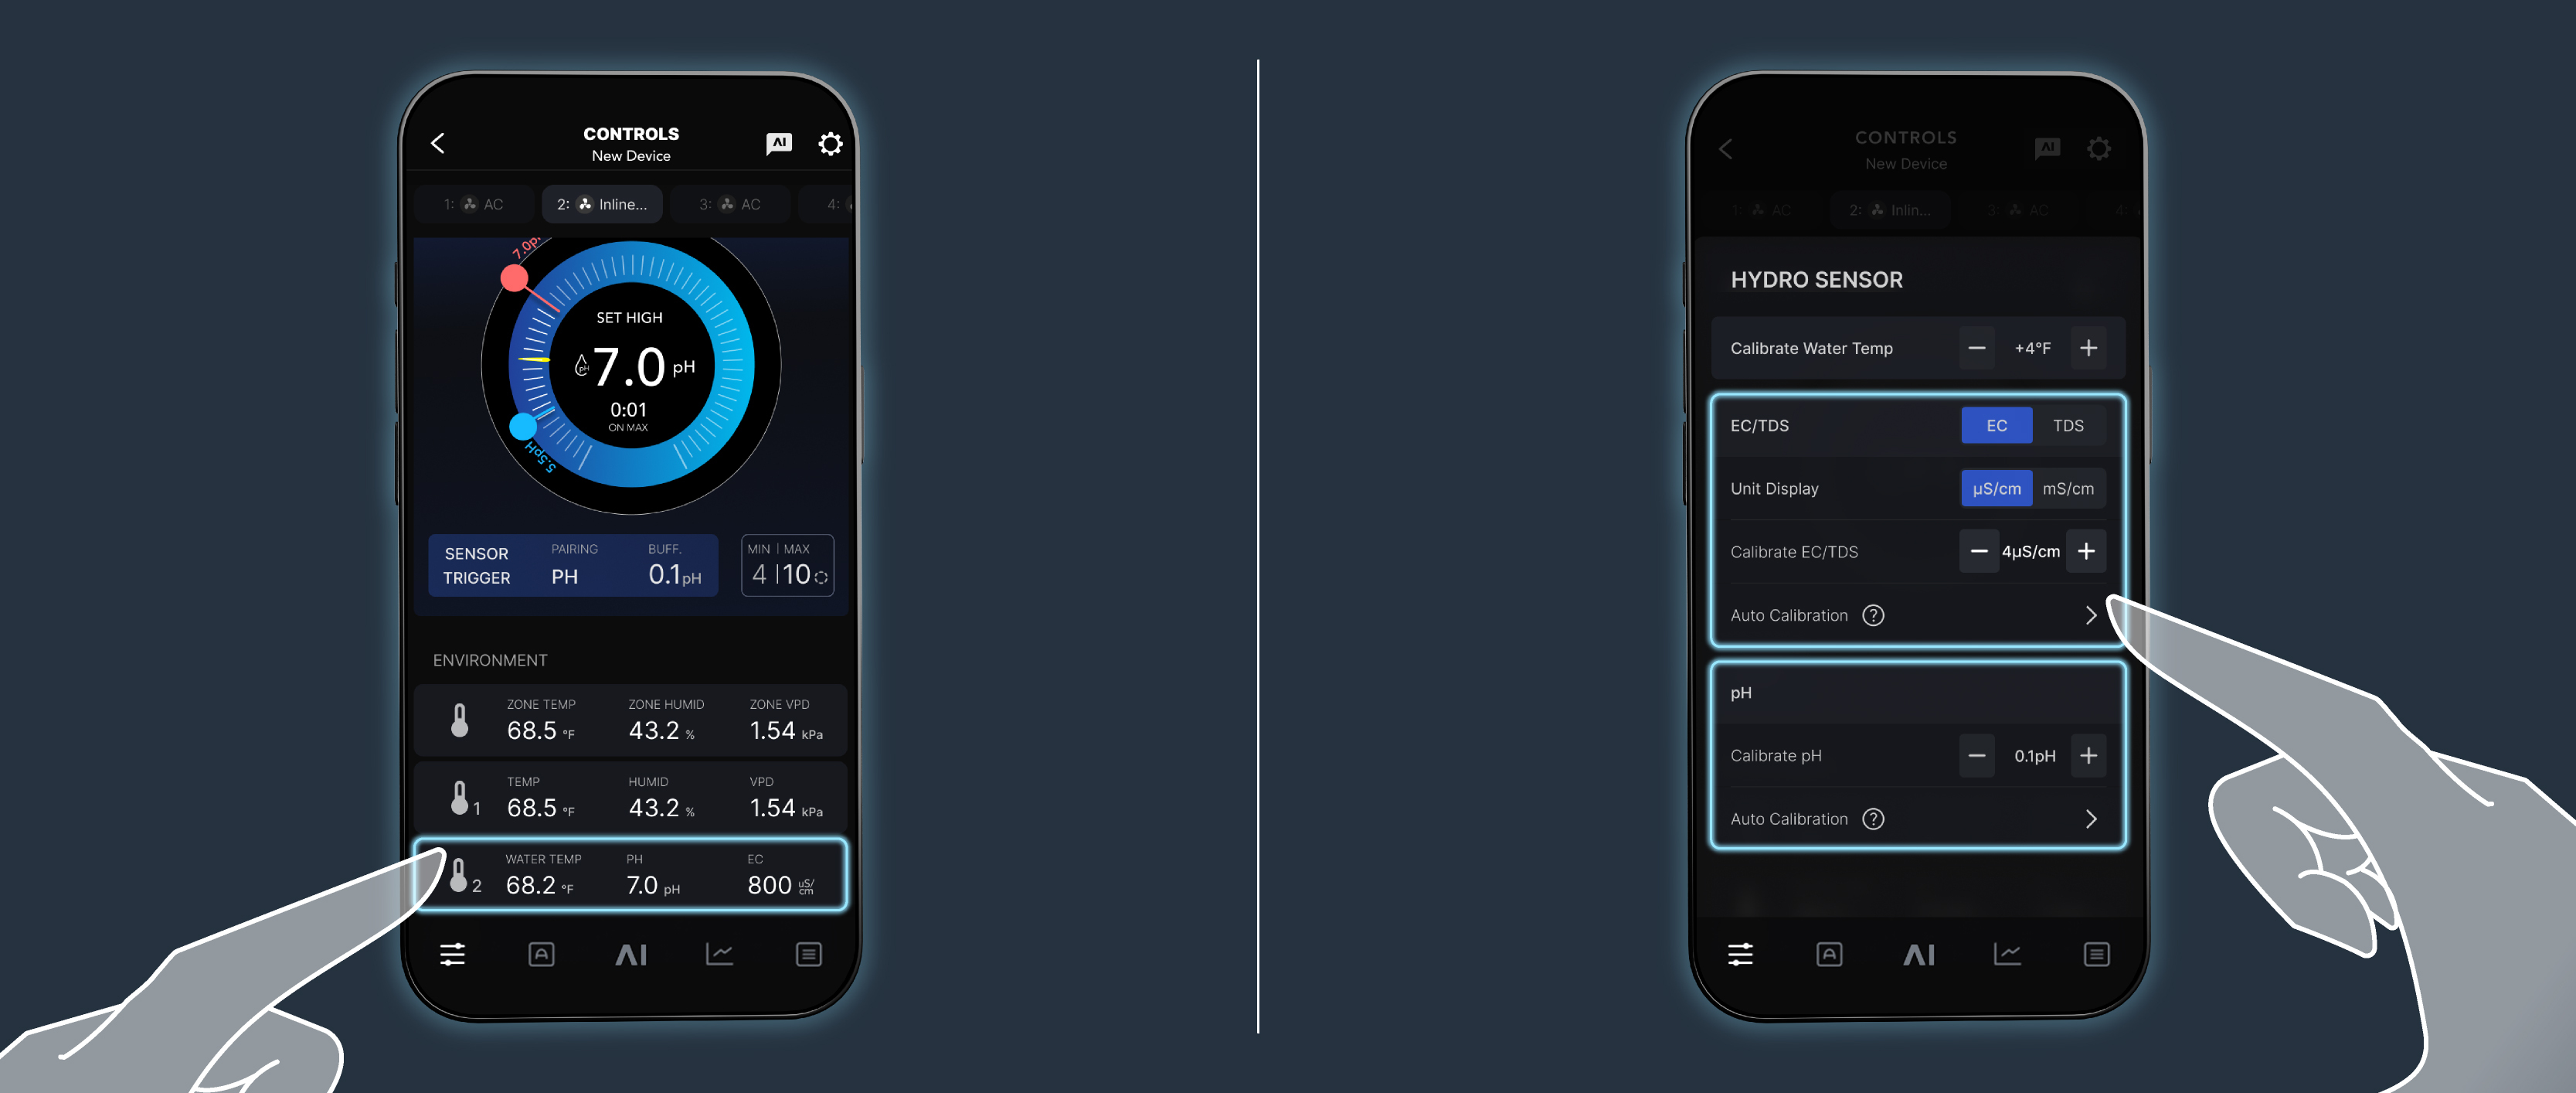
We recommend auto-calibrating the Hydro Sensor via the AC Infinity app before programming in order to get the most accurate readings. Select the Hydro Sensor from the Main Controls page to access calibration instructions.

Connecting the Hydro Sensor with the Peristaltic Pump will unlock Dose Time automations. This setting is intended to account for the time it takes a solution to evenly mix and disperse to prevent escessive dosing.
When your device is triggered, it will run for the Dose Duration before turning off for the Interval Duration to allow time for the solution to mix.
This cycle will repeat if readings are still below your trigger threshold after the Interval Duration ends.


